Perfect for bypassing geo-restrictions and enhancing streaming security, this guide will show you how to use a VPN with your smart TV. Discover the perks of VPNs, from privacy through IP address concealment to ISP throttling avoidance, ensuring smooth, uninterrupted streaming and network protection.
Our experts have tested numerous VPNs for Apple TV to ensure ease of setup and excellent performance. We've identified essential features that the leading Apple TV VPNs have, including user-friendly apps, stable connections, and robust security.
We'll guide you through using a VPN on your Apple TV, covering setup instructions to workarounds for VPN challenges, helping you enhance your streaming device's potential with a reliable VPN provider — minus the technical headaches.
Key takeaways for using a VPN for Apple TV
- With some of the best VPNs on the market, you can experience the world of unrestricted streaming on your Apple TV by simply downloading the VPN's app for Apple TV.
- Good news for users of tvOS 17 and later — direct VPN setup on Apple TV is now effortless. For others, worry not — alternatives like SmartDNS, streaming via AirPlay from a VPN-protected iOS device, or crafting a virtual router are still on the table.
- Based on our test results, the best VPN for Apple TV is NordVPN, thanks to its dedicated tvOS app, excellent streaming performance, strong security features, and reliable access to popular platforms like Netflix, Hulu, and BBC iPlayer.
Take your home network's security up a notch by integrating VPN services with one of the top VPN routers. This not only shields your Apple TV but also maintains a high-speed connection perfect for streaming.
Why use a VPN on Apple TV?
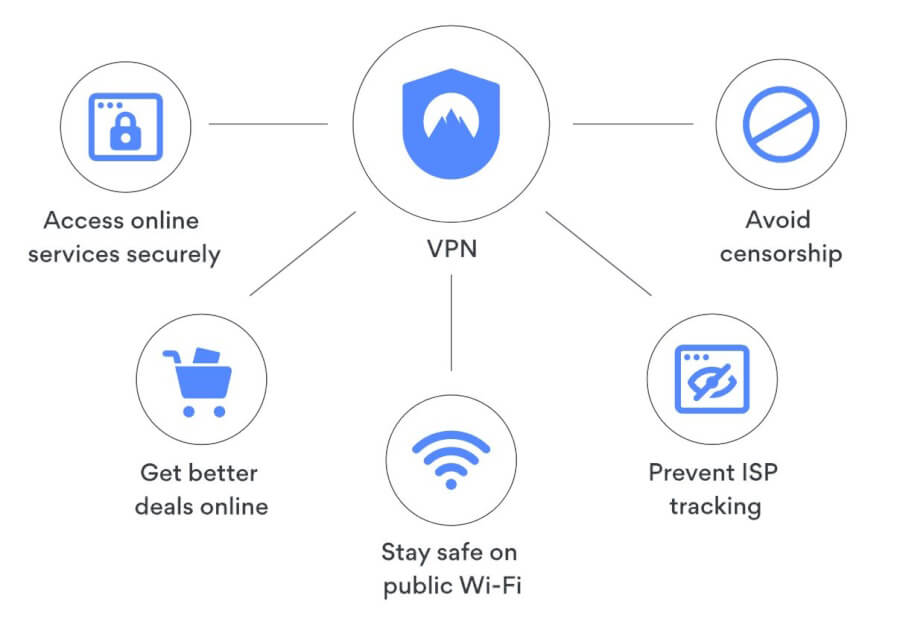
Imagine unlocking your favorite TV shows and movies from anywhere in the world, streaming smoothly without your ISP slowing you down, and enjoying your viewing in complete privacy, away from unwanted snooping. That's the practical magic of a VPN with your Apple TV.
Let's take a look at all the benefits of using a VPN:
- Boosted privacy and security – A VPN encrypts your internet connection, shielding your activity from hackers, ISPs, and other third parties. This is especially important when streaming on public Wi-Fi, where your data is more vulnerable.
- Protection from surveillance and tracking – VPNs prevent ISPs, advertisers, and even government entities from monitoring your online behavior. By masking your IP address and routing your traffic through secure servers, a VPN helps maintain your streaming privacy and minimizes data collection, thus protecting your digital footprint.
ISP throttling workaround – Ever felt like your streaming service is being intentionally slowed down? A VPN can help you bypass these deliberate slowdowns, ensuring uninterrupted, buffer-free enjoyment of your favorite content.
Worldwide content at your fingertips – You can think of a VPN as the ultimate entertainment enabler for your Apple TV, breaking down virtual borders and delivering a vast array of international shows and movies right into your living room.
Home network access, anywhere – Away from home, but still want to stream from your personal library or access files? A VPN allows you to securely connect to your home network, making it feel like you're right there in your living room.
Even if your Apple TV model doesn't directly support VPN apps, there are still ways to soak in these benefits, such as configuring the VPN on your router or opting for smart DNS.
The best VPNs for Apple TV (with a dedicated Apple TV app)
Choosing a VPN for Apple TV can be a daunting task, given the plethora of options on the market. However, three VPNs stand out from the crowd — NordVPN, Surfshark, and Proton. These VPNs not only offer dedicated Apple TV apps for seamless streaming but also come packed with features that ensure a secure and enjoyable streaming experience. What's more, they are also among the best VPNs for Windows PCs and laptops.
We'll take a closer look at these VPNs to understand what sets them apart.
1. NordVPN — Best VPN for Apple TV overall
| Website | NordVPN.com |
| Based in | Panama |
| Logs | No logs (audited) |
| Price | $3.39/mo. |
| Support | 24/7 live chat |
| Refund | 30 days |
| Deal | 70% Off Coupon |
As the top choice for Apple TV users, NordVPN delivers a specialized app designed to streamline the VPN setup process. With NordVPN, you can access a wider range of content from around the world, making it easier to enjoy high-definition streaming from your living room. Plus, its user-friendly design ensures that even those who are less tech-savvy can sail smoothly into a vast sea of international content.
When it comes to streaming on Apple TV, speed is non-negotiable. NordVPN is optimized for HD and 4K content, ensuring that your viewing experience is as smooth as silk — a must for the high-definition demands of Apple TV. Should you need help, NordVPN's customer support is there 24/7, with a wealth of tutorials and responsive live chat support, which you can access on the website here.
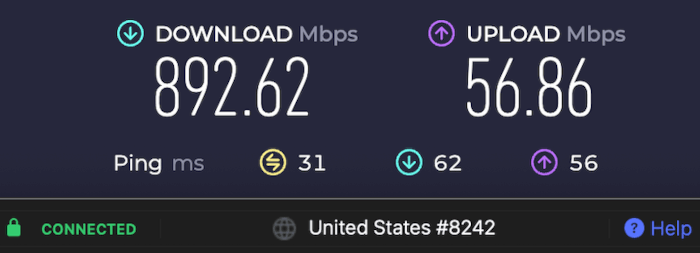
NordVPN's extensive server network, with over 8,000 servers spread across 126 countries, unlocks a treasure trove of content from around the world, right at your command. Remarkably, NordVPN's server speeds for streaming are exceptional. As demonstrated below, when testing the closest server in Seattle, we achieved download speeds of 892 Mbps — the fastest we've ever recorded on CyberInsider.
NordVPN's fast servers guarantee smooth streaming and browsing experiences, making it an excellent choice for all your online activities. But the real standout is the peace of mind NordVPN offers. This no-logs VPN offers top-tier 256-bit encryption, DNS leak protection, and advanced privacy features that create a private streaming sanctuary, keeping prying eyes at bay.
While NordVPN's price point might be a bit above some of its competitors, the value it delivers is unmatched. NordVPN surpasses ExpressVPN in speed tests and server options, making it the preferred choice for Apple TV aficionados who demand the best. To top it off, NordVPN's 30-day money-back guarantee invites you to see for yourself why it's heralded as the ultimate VPN choice for Apple TV users around the world.
As we write, NordVPN presents three different subscription options, each designed to cater to your specific preferences:
Basic – This plan provides a full-featured VPN service coupled with the Threat Protection Pro anti-malware feature.
Plus – This package includes the VPN service as well as NordPass, a secure password manager.
Complete – This plan offers the VPN, the password manager, and NordLocker, a secure cloud storage service.
NordVPN's Cyber Deal is live:
Get 70% Off NordVPN two-year plans with the coupon below:
(Coupon is applied automatically; 30-day money-back guarantee.)
For an in-depth evaluation and specific test findings, be sure to read our detailed NordVPN review. Moreover, if you're looking for guidance tailored to streaming, setting up NordVPN, our expert guide on NordVPN for Apple TV is a superb companion.
2. Surfshark — Unlimited streaming power for Apple TV
| Website | Surfshark.com |
| Based in | The Netherlands |
| Logs | No logs (audited) |
| Price | $1.99/mo. |
| Support | 24/7 live chat |
| Refund | 30 days |
| Deal | 87% Off Coupon |

When it comes to unlocking the full streaming potential of Apple TV, Surfshark offers an impressive combination of affordability, performance, and flexibility. With a dedicated tvOS app, Surfshark makes it easy to stream global content directly on your Apple TV, no complicated workarounds or router setups required. Its unlimited device policy means you can protect every screen in your household without worrying about connection limits.
Surfshark’s network spans over 3,200 servers in 100 countries, delivering fast and stable connections ideal for streaming on platforms like Netflix, Disney+, and BBC iPlayer. It's particularly effective at bypassing geo-blocks, giving you access to regional content libraries around the world with just a few taps. Whether you're switching to a U.S. server for Hulu or a UK location for Channel 4, Surfshark keeps the experience seamless.
Once you’re connected — indicated by the on-screen confirmation — you’re free to enjoy your favorite shows with enhanced privacy and minimal buffering.
Installation is quick and intuitive on the latest Apple TV models. Just download the Surfshark app from the App Store, sign in, and connect. Older Apple TV generations that lack App Store access can still benefit from Surfshark’s Smart DNS feature, which lets you unblock streaming platforms without full VPN encryption.
Surfshark also brings strong privacy protections to the table, including AES-256-GCM encryption, a strict no-logs policy, and secure VPN protocols like WireGuard. While it's primarily known for its streaming capabilities, Surfshark also performs well in privacy-focused use cases — ideal if you want a VPN that does more than just unblock content.
Surfshark VPN Coupon:
Get 87% off Surfshark VPN plus an additional 3 months extra with the coupon below:
(Coupon is applied automatically; 30 day money-back guarantee)
To dive into a comprehensive analysis and discover specific test results, be sure to read our in-depth Surfshark review. And for tips specifically tailored to enhance your Apple TV streaming, don't miss our expert guide on Surfshark and Apple TV.
3. Proton VPN — Streaming privacy perfected on Apple TV
| Website | ProtonVPN.com |
| Based in | Switzerland |
| Logs | No logs (audited) |
| Price | $3.59/mo. |
| Support | Email + Chat |
| Refund | 30 days |
| Deal | 64% Off Coupon |
For Apple TV users who value both streaming access and data privacy, Proton VPN is a top-tier choice. With its dedicated tvOS app, Proton VPN delivers a smooth and secure experience right from your Apple TV — no need for extra devices or complicated setups. Built by the creators of Proton Mail, this VPN service is rooted in strong privacy principles and backed by Switzerland’s robust data protection laws.
Proton VPN’s high-speed Plus servers are optimized for streaming and deliver reliable access to platforms like Netflix, Amazon Prime Video, and BBC iPlayer. Whether you're switching to a U.S. server for Max or a European one for local content, Proton VPN maintains solid speeds and smooth playback— perfect for HD and even 4K streaming. VPN Accelerator technology also kicks in behind the scenes to reduce latency and improve performance on slower networks.
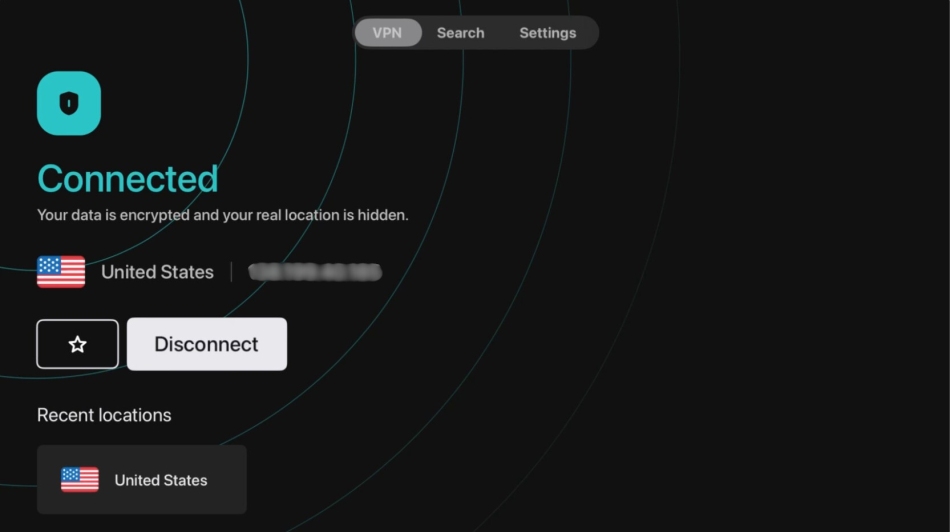
After selecting your preferred server and seeing the “Connected” message, you're ready to stream safely and without borders. To change your location, open the Proton VPN app on Apple TV, navigate to the server list, and select from a wide range of countries. You’ll also find a Recommended section for quick access to your most-used locations.

The setup process is streamlined on the latest Apple TV models. Just install the app from the App Store, log in with your Proton account, and you’re good to go. For older devices without native app support, Proton VPN offers Smart DNS functionality, allowing you to bypass geo-restrictions without using a full VPN tunnel.
On the privacy front, Proton VPN goes above and beyond. It uses strong AES-256 encryption, maintains a strict no-logs policy, and has undergone independent security audits to verify its practices. Unlike many competitors, Proton VPN also offers open-source apps, adding a layer of transparency rarely seen in the VPN industry.
Proton VPN supports advanced features like Secure Core, which routes your traffic through privacy-friendly countries before exiting to the public internet. While not strictly necessary for streaming, it's a valuable option for users who prioritize anonymity. The Proton VPN app also integrates well with tvOS, offering a clean interface and fast reconnections — making it a strong, privacy-first option for your Apple TV setup.
Proton VPN Coupon:
Get 64% Off Proton VPN (drops the price to only $3.59/month) with the coupon below:
(Coupon is applied automatically; 30-day money-back guarantee)
For a thorough exploration and detailed test results, don't miss our extensive Proton VPN review. Additionally, our expert guide on Proton VPN for Apple TV will be your perfect companion in maximizing your streaming experience.
Setting Up a VPN directly on your Apple TV
The idea of setting up a VPN directly on your Apple TV may sound technical, but the process is quite straightforward. Since the tvOS 17 update, you can install VPN apps directly onto your Apple TV, allowing for a seamless streaming experience. However, bear in mind that the selection of VPN apps for tvOS is somewhat restricted, so you may need to explore other methods like setting up the VPN on a router or using the smart DNS feature.
For this guide, let's shine the spotlight on NordVPN. It's our top pick, thanks to its standout performance and ease of use, making it a breeze for anyone to navigate the high seas of international streaming.
Install and activate the VPN app
Once you've selected a VPN that's compatible with Apple TV, follow this straightforward guide to get the VPN app up and running.
Turn on your Apple TV – Use the remote control to power up your device and navigate to the main menu.
Access the App Store – Locate the App Store icon and select it to browse available apps.
Search for the VPN app – Utilize the search function to find the app of your choice.
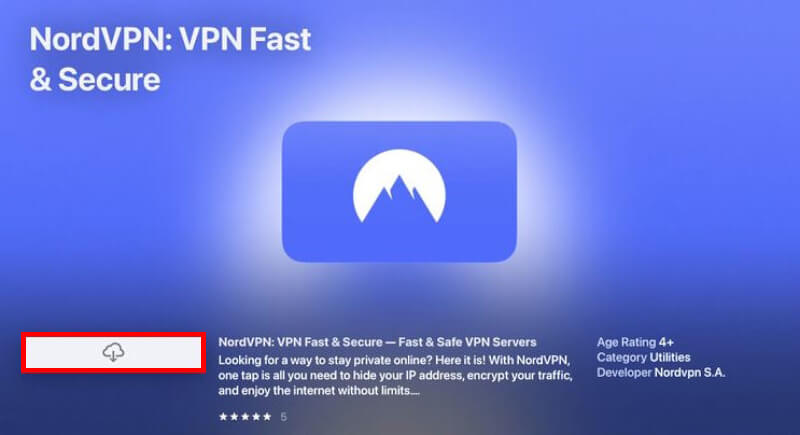
Install the app – Select the desired app from the search results and choose “Install” to add it to your Apple TV.
Launch the app – Open the newly installed app to begin the setup process.
Log in or sign up – Enter your existing VPN account credentials or create a new account if you're a first-time user.
Accept privacy terms – Review and agree to the privacy terms provided by the VPN service to proceed.
Account verification – Some apps may require a two-factor authentication (2FA) step, which could involve entering a code sent to your email or mobile device.
Not only does a VPN allow you to bypass geo-restrictions, but it also protects against browser fingerprinting — a technique used by many sites to track user behavior. By securing your connection, you're also ensuring that your use of private search engines remains just that — private. With a VPN, your Apple TV becomes a portal to a boundless and secure world of entertainment.
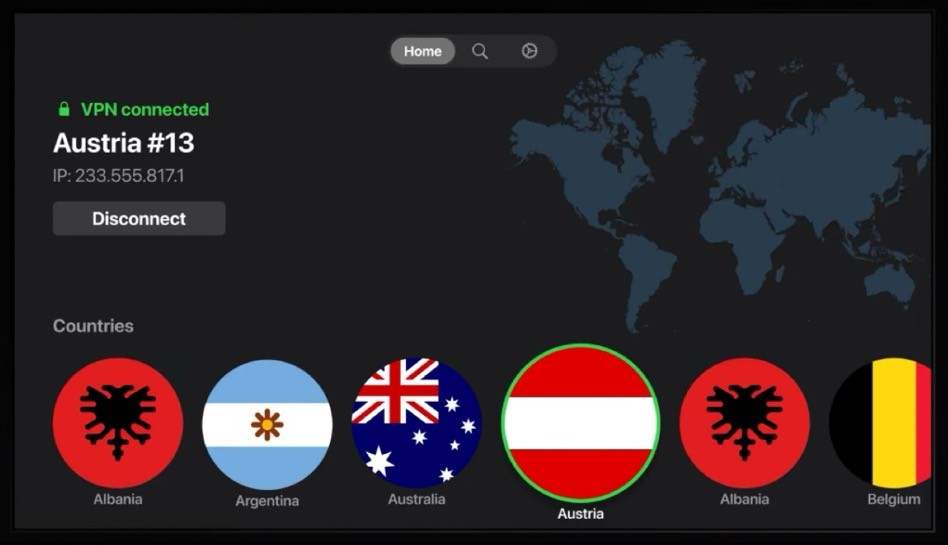
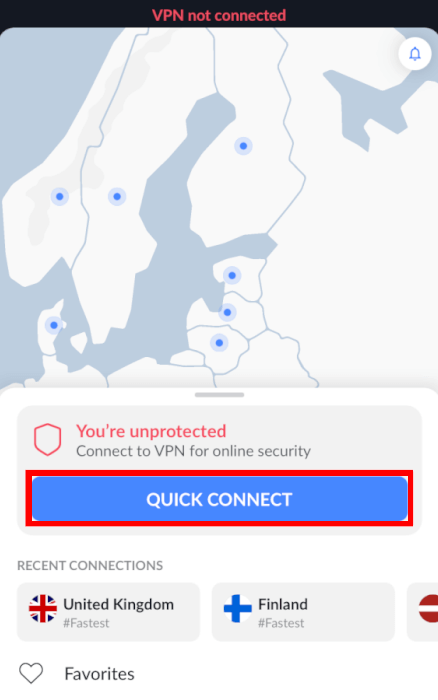
Connect to a VPN server on your Apple TV
Now that you've got your VPN app up and running, it's time to connect to a VPN server, unlocking a world of streaming content for your enjoyment:
Launch the VPN app – Open the VPN application on your Apple TV's interface.
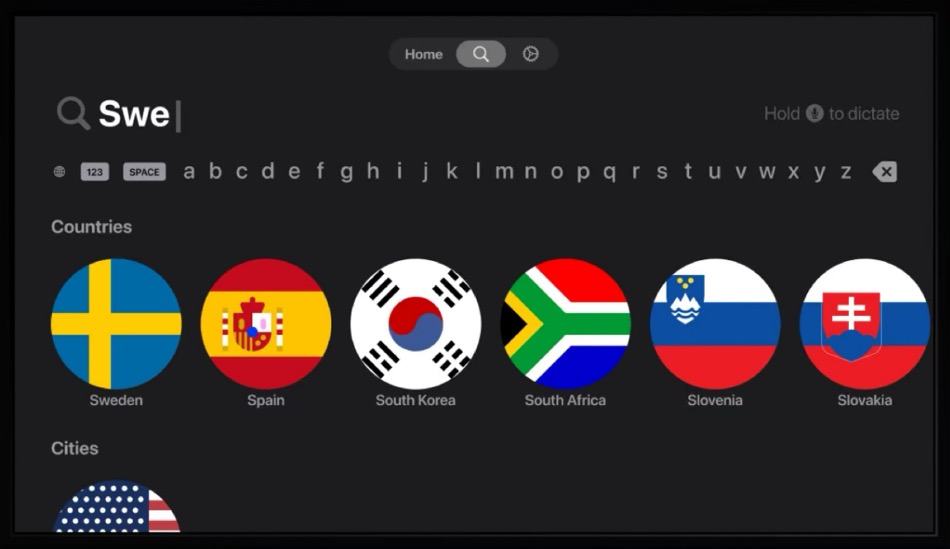
Select a VPN server location – Browse through the available server locations and choose one that aligns with the content you wish to access. For example, select a US server if you want to watch American Netflix shows.
Connect to the server – Press “Connect” to initiate a secure VPN connection with the chosen server.
Confirmation and streaming – Wait for a confirmation that the connection is established, then exit the app and begin streaming your desired content with enhanced privacy.
Server switching – Should you need to change your virtual location, simply return to the app and select a new server from the list.
With these insights and tools, you're ready to dive into a seamless, borderless world of streaming on your Apple TV. Whether you're using a VPN for Netflix to change your Netflix country or exploring other global content, the only limit is what you choose to watch next.
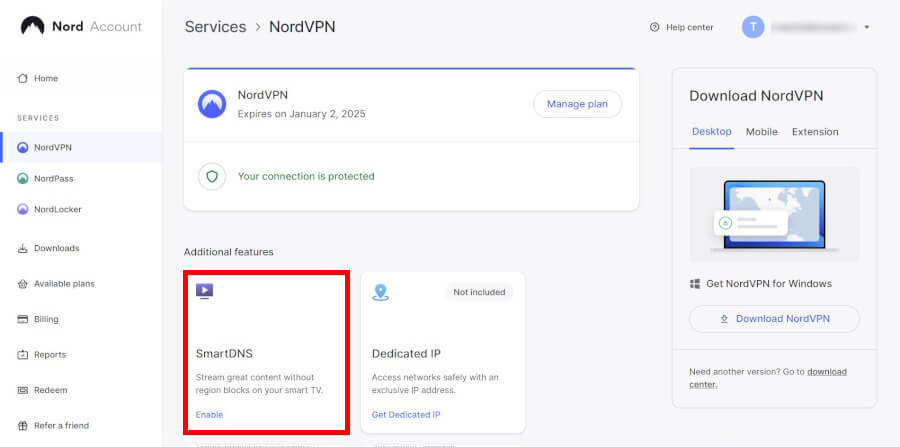
Smart DNS: A convenient alternative for Apple TV
Smart DNS is a handy alternative to VPNs for accessing geo-restricted content on Apple TV, offering faster connections and compatibility with various devices. However, unlike the encrypted shield provided by VPNs, smart DNS only reroutes specific traffic, which means it lacks the same level of privacy protection.
Keep in mind that some streaming platforms may block smart DNS services. Therefore, while it's a useful tool for bypassing regional blocks, it's important to consider its privacy limitations and whether it meets your streaming needs.
Here's a quick guide to setting up smart DNS on your Apple TV.
Configuring DNS Settings on Your Apple TV
T
Setting up smart DNS on your Apple TV is a straightforward process that leverages your existing subscriptions from anywhere, with minimal impact on your internet speed. Follow this slightly rewritten step-by-step guide to configure smart DNS, using NordVPN as an example, which involves using the VPN provider's website:
Whitelist your IP address with NordVPN:
Log in to your account through the VPN provider's website.
Find the smart DNS section and enable the smart DNS feature.
Whitelist the IP address you will be using with your Apple TV. This is crucial for the smart DNS service to recognize your network.
Access the Apple TV network settings:
Turn on your Apple TV and navigate to the “Settings” menu.
Scroll down and select “General”.
Navigate to Wi-Fi settings:
Within the “General” settings, find and select “Network”.
At the top of the “Network” menu, select ‘Wi-Fi'.
Choose the Wi-Fi network that corresponds to the IP address you whitelisted earlier.
Configure your DNS:
With the Wi-Fi network selected, scroll to “Configure DNS” and choose “Manual”.
Enter the smart DNS server addresses provided by NordVPN:
For the primary DNS, input 103.86.96.100.
If a secondary DNS is requested, use 103.86.99.100.
Restart your Apple TV:
To ensure the changes take effect, restart your Apple TV. This can be done by unplugging the device and plugging it back in, or by navigating to “System” and selecting “Restart”.
While SmartDNS adds a layer of security by preventing DNS leaks during your VPN connection, it does not encrypt your traffic like a VPN does. However, it's still a great option for accessing geo-restricted content without the encryption overhead that can affect speeds.
Using AirPlay to stream with a VPN
For those times when installing a VPN app on your Apple TV isn't an option, or you're looking for a quick way to cast content, AirPlay is your friend. Simply use it to stream from any iOS device that's already running a VPN to your Apple TV. It's a handy workaround that's both quick and user-friendly.
Let's walk through the process of setting up a VPN on your iOS device and using AirPlay to stream to your Apple TV.
Setting up VPN on your iOS device
For Apple users, the simplest way to enjoy the benefits of NordVPN on Apple TV, often referred to as the best VPN for iPhone and iOS, is through AirPlay. This feature allows you to cast content from your VPN-protected Apple hardware directly to your Apple TV.
Here's a quick guide to get you started:
- Download and install NordVPN: Begin by downloading the NordVPN app on your Apple device (iPhone, iPad, or MacBook).
- Connect to a server: Launch NordVPN and connect to a server in the desired location for your streaming content.
- Enable AirPlay: Swipe to open the Control Center on your iOS device or click the AirPlay icon in the menu bar on your MacBook.
- Select your Apple TV: In the AirPlay menu, choose your Apple TV device from the list of available options.
- Start casting: With the VPN active and your device connected to Apple TV via AirPlay, you can now stream content securely from your Apple device to your TV.
By following these steps, you can enjoy a seamless and secure streaming experience on your Apple TV with NordVPN.
Creating a VPN-enabled virtual router
If you’re looking for a way to share your VPN connection with other devices in your home, like your Apple TV, creating a VPN-enabled virtual router on your computer might be the solution you’re looking for. By setting up a virtual router, you can enable devices such as Apple TV to connect to the VPN service by sharing the VPN connection from your computer. This method is particularly useful if your Apple TV doesn’t natively support VPN apps.
How to connect Apple TV to a VPN via a virtual router on your computer
Turning your computer into a virtual router is a savvy move, and it's not as complicated as it might sound. Whether you're team Windows or a macOS enthusiast, you'll be setting up your computer to share its internet love in the form of a Wi-Fi hotspot.

Here's how to set up a network with all the VPN protection you need:
- Activate the hotspot feature on your computer to share your internet connection. Here's how you can do it:
- On a Windows PC: Go to “Settings” > “Network & Internet” > “Mobile hotspot”, and flip the switch for “Share my Internet connection with other devices.”
- On a macOS device: Head over to “System Preferences” > “Sharing”, tick “Internet Sharing,” and make sure Wi-Fi is selected in the “To computers using” list.
- Connect to a VPN server using your preferred VPN app. This will ensure that your new Wi-Fi hotspot is under the secure umbrella of your VPN.
- Now, let's hook up your Apple TV to this virtual router.
- On your Apple TV, slide into the “Settings” menu.
- Tap “Network”.
- Choose “Wi-Fi” to see the list of Wi-Fi networks.
- Pick the network that matches the virtual router you've just created on your computer.
For those who are also keen on safeguarding their online privacy beyond their smart TV usage, taking proactive steps such as fine-tuning your Windows privacy settings is a wise and effective strategy.
Integrating VPN services at the router level
Setting up a VPN on your router is a smart strategy for those prioritizing security. It extends VPN protection to every device on your network, serving as a comprehensive security measure. With your router's VPN shield active, you can enjoy uninterrupted protection and peace of mind.
This setup is a boon for 4K streaming aficionados, ensuring rapid connections for flawless, buffer-free high-definition viewing.
Here's a simplified rundown of integrating VPN services with your router:
Find your router’s IP address – You can usually locate this in the router's manual or by querying “What is my router's IP address” from a connected device.
Log into your router’s settings – Type the IP address into your web browser's address bar and sign in with the credentials typically found on the router or in its manual.
Set up the VPN connection – Within your router's settings, navigate to the VPN section to enter your VPN service details, such as the server address, username, and password.
How to troubleshoot common VPN issues on Apple TV?
While VPNs tend to work smoothly with Apple TV, there may be times when you encounter issues, such as the notorious Netflix proxy error. However, most of these hiccups come with straightforward fixes:
Apple TV not recognizing VPN: If your Apple TV seems oblivious to your VPN, a good old-fashioned restart often does the trick. Just unplug your TV, wait a few seconds, and plug it back in to refresh the connection.
Streaming services blocking VPN IP: Run into the dreaded geo-block? Switching the server location in your VPN app might be your ticket back to streaming paradise. A different server could provide an IP that hasn't been blacklisted.
SmartDNS challenges: Using SmartDNS but still can't outsmart geo-restrictions? You might need to block Google DNS on your router to prevent sneaky location leaks that give the game away.
How to use a VPN on Apple TV FAQ
What are the best VPNs for Apple TV?
When it comes to streaming on Apple TV, NordVPN shines as the top choice. Here's why: NordVPN offers exceptional performance and reliability, ensuring smooth streaming sessions without buffering or interruptions. With its user-friendly interface, NordVPN makes it a breeze to set up and use, even for those who aren't tech-savvy. It's also praised as the best VPN for Apple TV on Reddit.
NordVPN provides a vast network of servers optimized for streaming, allowing you to access geo-restricted content from around the globe with ease. Alongside NordVPN, VPNs like Surfshark and Proton VPN are also top contenders, offering robust security features, user-friendly interfaces, and extensive server selections to ensure a smooth and versatile streaming experience on Apple TV.
While options like PIA, CyberGhost, ExpressVPN, and IPVanish offer their own benefits, none quite match the comprehensive package provided by NordVPN. PIA stands out for its customizable security features and now includes a native Apple TV app, but its streaming performance can be inconsistent. CyberGhost is known for its strong privacy protections and streaming-optimized servers, but the lack of a tvOS app means setup requires workarounds like Smart DNS or router-level configuration.
ExpressVPN offers excellent streaming speeds, but its higher price point may not be justifiable for all users. IPVanish, meanwhile, includes unlimited device connections, but lacks some advanced features and streaming support that power users may want. Overall, NordVPN remains the preferred choice for users seeking the best balance of performance, features, and reliability on Apple TV.
You can also see how NordVPN beats most of the competition in these comparison guides:
- NordVPN vs Surfshark
- NordVPN vs Proton VPN
- NordVPN vs ExpressVPN
- NordVPN vs CyberGhost
- NordVPN vs PIA
- NordVPN vs TorGuard
How do I change my VPN location on Apple TV?
To change your VPN location on Apple TV with a VPN app, simply open the app and look for a new server location. You'll find an organized selection of countries or cities hosting servers, providing a range of virtual destinations to choose from.
Pick your new location, and the app will swiftly update your IP address to match the selected area, giving you instant access to region-specific content with minimal fuss. Whether you're using a VPN for Canada to access local streaming services or a VPN for China to bypass strict internet censorship, the process remains just as seamless.
Why is my VPN not working on Apple TV?
If you're scratching your head wondering why your VPN and Apple TV aren't playing nice together, don't worry, there's usually a simple fix.
First things first, double-check that the VPN app is properly installed on your device and that you're logged in. Make sure your subscription is active and that your internet connection is as steady as a rock. If you're up to date and still hitting a wall, give your Apple TV and the app a quick reboot.
Should the gremlins continue to cause trouble, it's time to reach out to your VPN provider's customer support for some expert troubleshooting or dive into any Apple TV-specific guides they might have up their sleeve.
Other Apple TV VPN guides on CyberInsider:
- Best VPNs for Apple TV
- NordVPN for Apple TV
- How to Set Up NordVPN for tvOS
- ExpressVPN for Apple TV
- IPVanish for Apple TV
- Surfshark for Apple TV
- Proton VPN for Apple TV
- CyberGhost for Apple TV
- Private Internet Access for Apple TV
- Best VPNs for tvOS
Conclusion: Elevating your Apple TV experience with the right VPN
At this point, you're well-equipped with the knowledge that a steadfast VPN can truly transform your Apple TV experience, granting you access to a world of content while bolstering your streaming with both speed and privacy.
For the smoothest setup, consider installing a VPN directly on your Apple TV. If your Apple TV model doesn't support direct VPN app installation, fear not — there are still reliable alternatives like smart DNS or creating a virtual router on your computer.
Putting the spotlight on NordVPN, we find it stands out as an excellent choice for Apple TV users. Its dedicated app is designed with ease of use in mind, ensuring a secure, private, and unbounded streaming adventure.
Armed with this guide, you're all set to navigate the vast ocean of digital content, shielded by the robust protection of a VPN. For additional options, check out our guide on the best VPNs for Apple TV.
Leave a Reply