In this guide we're going to introduce you to two-factor authentication (2FA), and show you how to set it up for many of the most popular online services. But first, let us set the stage for this discussion.
We all know people who have had their data stolen from one account or another. Many people are victimized but don't even know if for months due to slow or non-existent reporting by corporations and other organizations.
As we explained before,
- Breaches of corporate databases containing our personal information keep increasing (see the Compilation of Many Breaches COMB).
- Phishing attacks that try to trick you into giving some creep access to your data remain a major threat.
- Ransomware attacks are aimed at everyone from individual users to large corporations and even cities.
It is clear that things need to change and we all need to up our security game.
Introduction to 2FA
While we can't force big companies to stop being careless with the personal data they extract from us, we can improve security on our end. This is where two-factor authentication (2FA) comes into play.
As the name implies, two-factor authentication means you can't sign into your account with just a password. 2FA blocks access to an account unless you can produce two out of three of the following factors (pieces of evidence):
- Something you know, like your password
- Something you have, like your smartphone
- Something you are, like your fingerprint
Most of the time, 2FA systems combine something you know with one of the other two factors. That gives you something non-physical (the password) and something physical (the smartphone). This approach makes your accounts much more secure.
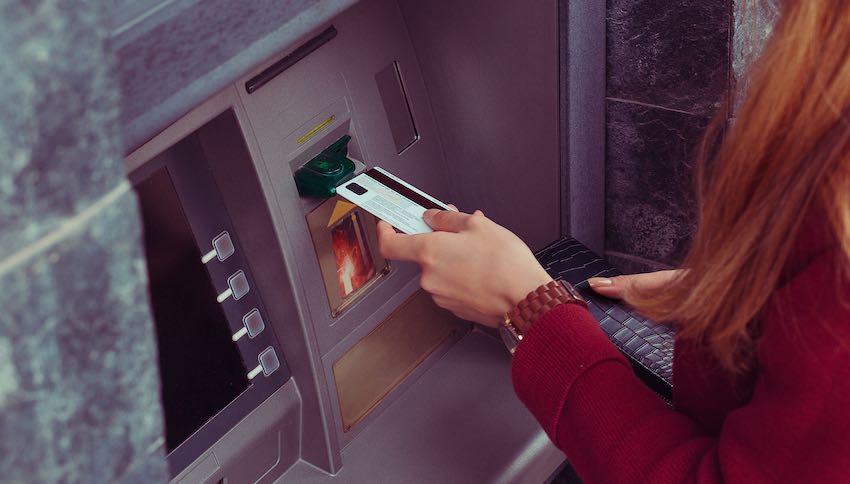
ATMs use a form of 2FA. You need both your PIN (something you know) and your bank card (something you have) to get into the account.
Think about these scenarios:
- A creep watches over your shoulder as you log into your email at your favorite café. He now knows your login information. If your account isn't protected by 2FA, he is going to be reading your email before you finish your latte. If the account is protected by 2FA, he still can't get in. That's because he would also need the second, physical factor.
- A pickpocket on the train steals your wallet, including your ATM card. Because ATMs use 2FA, he still can't steal your money because the card is only one factor. He would also need your PIN or password to get at your money.
Will 2FA make my accounts more secure?
This sounds promising, but does the hassle of having to use 2 factors all the time produce any benefits in the real world?
The answer is a resounding, YES!
Last year, both Google and Microsoft published reports showing that 2FA, while not a perfect shield against attacks, is incredibly effective against automated attacks.
In May, the Google Security blog ran a post that showed that using on-device prompts (a simplified form of 2FA), “helped prevent 100% of automated bots, 99% of bulk phishing attacks and 90% of targeted attacks.”
In July, the Microsoft Azure Active Directory team published a report based on their experiences defending against hundreds of millions of password-based attacks a day. You can read the full report here if you like, but for our purposes, all you really need to know is that the team found this:
Based on our studies, your account is more than 99.9% less likely to be compromised if you use MFA. [Multi-Factor Authentication]
That sounds pretty convincing to us.
How does 2FA work? Is it a hassle to use?
You now know the concept behind 2FA, but we haven't yet talked about how it actually works in practice. Think again about using your favorite ATM. You insert your card, then you enter your PIN, then money comes pouring out.
In this case, the hassle is minimal. If you have your card in hand, and remember your PIN, it only takes a few seconds more to use the ATM's 2FA system than it would if you only needed one factor to log in. But that's because the ATM has a nice card slot and numeric keypad right there for you to use.
The hassle level goes up when you want to use 2FA with accounts you access from your computer or mobile device. Why? No card slot or handy keypad for entering PINs.
Without those, system designers needed to get more creative. They came up with four ways to provide that second factor.
Two-Factor Authentication methods
When you aren't using an ATM or a retinal scanner or similar special 2FA hardware, there are four commonly-used 2FA methods:
- Test messages (SMS)
- Authentication apps
- Security keys
- Backup codes
Let's go into a little more detail on each of these.
1. Text messages (SMS)
When you enter your password on a site that uses text messages for a second factor, the site sends a text message containing a numeric code to your telephone. You need to enter this code at the site to provide the second factor and complete the login process.
Text messages are easy to set up and use, but SMS is not very secure. Hackers may be able to intercept text messages being sent to your phone.
There have also been cases of social engineering where hackers have convinced a phone company to transfer your telephone number to a phone in the hacker's possession. This potentially gives the hacker access to every account you have that uses SMS for authentication.
2. Authentication apps
Authentication apps are apps that reside on your smartphone. Unlike the text message method, using an authentication app doesn't rely on receiving a code sent by the service you want to log into.
Instead, the app generates an authentication code itself. When you first configure an authentication app to work with a specific service, the app and the service exchange a secret code (we'll talk about how that happens later).
Using that secret code and the current time (smartphones have very accurate clocks built into them) the app generates an authentication code for you to enter into the service when required. Apps generate new codes every 30 to 60 seconds and need to be entered before they expire.
Because the authentication codes are generated using the saved shared secret and the time, the app doesn't need a data connection to function. In fact, it doesn't even need cell service.
To use this method you will need to install an appropriate authenticator app on your phone. We say appropriate because some sites require you use a specific app. While Google Authenticator is probably the most popular and widely-used app, some sites require you to use an alternative such as Authy or Microsoft Authenticator.
Setting up your authenticator to work with a site usually involves scanning a QR code containing the shared secret with the phone's camera.
3. Security keys
Security keys are physical devices that can take the place of authentication apps. They are tiny physical devices that typically plug into a USB port on your device, for example, Yubikey. Some also have Bluetooth or NFC capability, allowing you to use them without physically plugging them into your computer or phone.
These keys can eliminate much of the hassle of 2FA. Once set up, all you need to do is plug in the key and touch the button on it whenever you need to authenticate.
As long as you have your security key, you don't have to worry about receiving SMS messages or whether the authentication app on your smartphone is working. You don't even need to have a smartphone. This is a really secure 2FA factor.
But nothing is perfect. Drawbacks of security keys include the fact that you need to buy them, you need to have it with you whenever you plan to log into a protected site, and they are not yet compatible with every 2FA capable system out there.
4. Backup codes
In addition to the factors mentioned so far, some sites and services create backup codes. Backup codes are one-time codes that you can use to get into your account when you don't have access to any of the other 2FA methods (your phone is broken or your security key was stolen). Some secure email services utilize recovery codes, as we noted in the Tutanota review.
If a site or service offers to generate backup codes for you, you should take advantage of that. Generate the backup codes and store them somewhere safe like in a good password manager. That way, if you do lose your ability to use any of the other factors, you can still log in and take steps to correct the situation.
What's the deal with those black squares (QR codes)?
Once you start setting up 2FA on your accounts, you are sure to run into those weird black squares called QR codes. QR (Quick Response) codes are a type of barcode that can be read by many types of devices, including your smartphone. These codes are how an authentication app can share a secret with a site or service.
When a service displays one of these black squares, tell the authentication app on your phone you want to add a new code. The app will activate your phone's camera. Point it at the QR code and the app will use the information contained in the code to configure the app.
This is much easier and more accurate than copying a long string of random characters (the shared secret) into the app by hand.
Which 2FA authentication method is best?
There is no one authentication method that is best across the board. You are of course limited by the methods that a particular service supports (few support all four).
And you are limited by the tools you have available and the circumstances under which you will be logging in to the service. If you will need to log in from a location where you don't have cellphone service, SMS (text messages) will be of no use. And if you don't have access to a security key, you are out of luck there.
The best we can do is give you some general guidelines:
- Text messages (SMS) are the least secure method. While it is better than nothing, choose one of the other methods if possible.
- Authentication apps are secure, and a good choice if you will have your smartphone available whenever you need to log in.
- Security keys are the most secure option, if you can be sure to always have the key available when you need to log in (and never lose it).
- Backup codes are just that, backups for when you don't have access to any of the other options. Remember that they are one-time codes, so only use them in emergencies.
Final questions before getting started with 2FA
Here are a few more common questions we hear related to using 2FA:
Do I really need to do all this every time I log in?
Once you enable 2FA on an account, you have to provide that second factor whenever it is requested. Some services require you to use the second factor every time you log in.
Others let you opt out of using the second factor on specific web browsers or devices. There will be some kind of message to that effect if you can do so.
What if I don't have my phone on me?
Backup codes are the answer for those times when you don't have your phone on you.
What happens if I forget my password or get locked out of my account?
Each site has its own procedures for what happens if you forget your password or get locked out of your account. Somewhere during the recovery process you will still need to use that second factor to confirm your identity, so make sure you have it available when you begin the process.
How do I transfer my 2FA accounts to a different phone?
If you are using SMS text messages for 2FA, moving your accounts to a different phone is easy if you can transfer your phone number to the new phone. Your SMS messages will start appearing on the new phone as soon as the number gets transferred.
If you will be changing phone numbers, you will have to go in and set up the new phone number on all of your services while you still have access to your accounts using the old number.
If you are using an authentication app, you will need to check out their instructions for making the transition. For example, in May 2020, a new version of Google Authenticator arrived on the scene. One of its new features is the ability to move your 2FA codes (Google calls them 2SV codes) across Android devices.
How to set up 2FA on your favorite sites and services
Now that you have all the background information, it is time to start activating 2FA. But if you think about how many things you need to protect, you probably have two more questions:
How do I know which services support 2FA?
2FA is common enough these days that you can assume most services support it. We've covered many of the most popular services right here in this post. If you don't find a service you are interested in here, your next step should probably be to check a site called Two Factor Auth. They list a massive number of sites that support 2FA, organized into categories like Banking, Social, Education, and many more.
Finally, if a service is really important to you and you don't find it either here or over at Two Factor Auth, you could contact their Customer Support team and dig around a bit on their Help pages. Not every service is good about updating their website, and it is worth taking a look if the service is one you really want to protect.
Which services should I protect first?
We suggest you start with your password manager. With all your passwords stored in one place, your password manager is a high-value target for hackers.
After that, your email accounts are a good next step. Anyone hacking into your email would have access to a vast amount of your personal information, and could use your account to cause all sorts of trouble for everyone in your address book too.
Next, we recommend any service that has a copy of your credit card information. You don't want someone to start buying stuff on your dime.
Then there is social media. Like your email accounts, your social media accounts are stuffed full of personal information that bad guys would love to get their hands on, as well as connections to all your friends and family. (The best option is to simply not use social media, which is just a data collection tool to profit off ads.)
Last but not least, see if any of your banks or other financial service companies have 2FA support. You would think that these folks would be at the top of the list for protection, but most of these organizations have their own techniques to prevent fraudulent use. If you've ever been locked out of your bank website when using a new browser, or found your credit card blocked when you tried to use it on vacation, you've run into one of these systems. While running afoul of these systems is a huge pain in the neck, the bank or credit card company is protecting your account for you.
One last thing before we get into the 2FA-ing of your life: while we have been using 2FA throughout this guide, various services use various names for the same basic system. Google calls it 2-step verification. Other services use their own variations. It all means using two factors to protect your account access.
How to use 2FA with your accounts
Instead of trying to come up with an elaborate organizational scheme for all this, we opted for simplicity: the services and accounts that follow are listed in alphabetical order.
Amazon: Two-step verification
Amazon logins affect not just the giant online store; they also control access to services like Audible.com. Setting it up is quick and easy:
Go to Amazon.com on the desktop and log in to your account. Click Accounts & Lists. In the menu that appears, click Your Account. On the Your Account page, click Login & security. On the Login & security page, find the Two-Step Verification (2SV) Settings and click the Edit button.
Amazon will demand that you enter your password again to continue to the Two-Step Verification (2SV) Settings page.
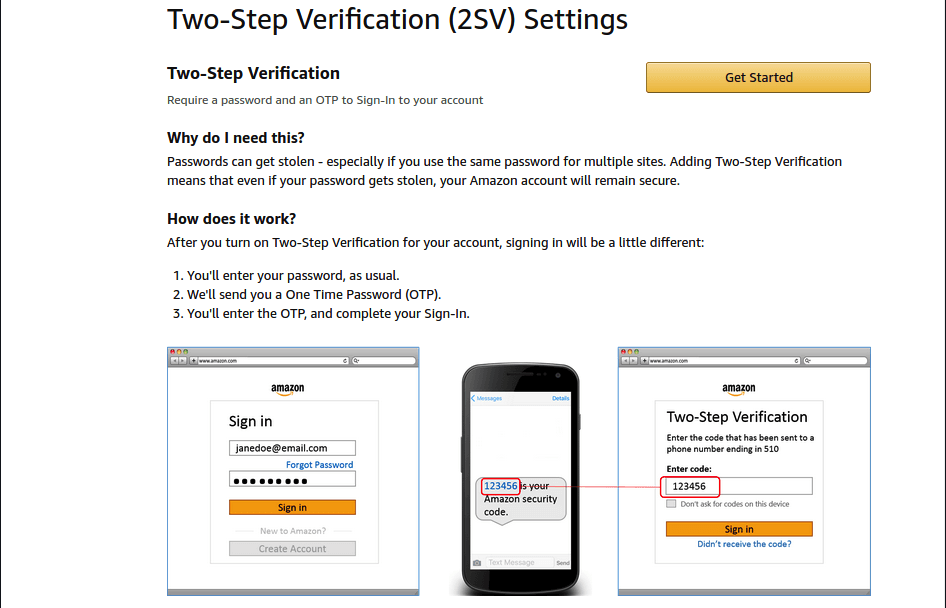
Click the Get Started button to, well, get started. Select one of the two options: Phone Number or Authenticator App. Follow the on-screen instructions to set up either of these. Unfortunately, you won't be done quite yet. As it says on the page, “Just two more important things to know.”
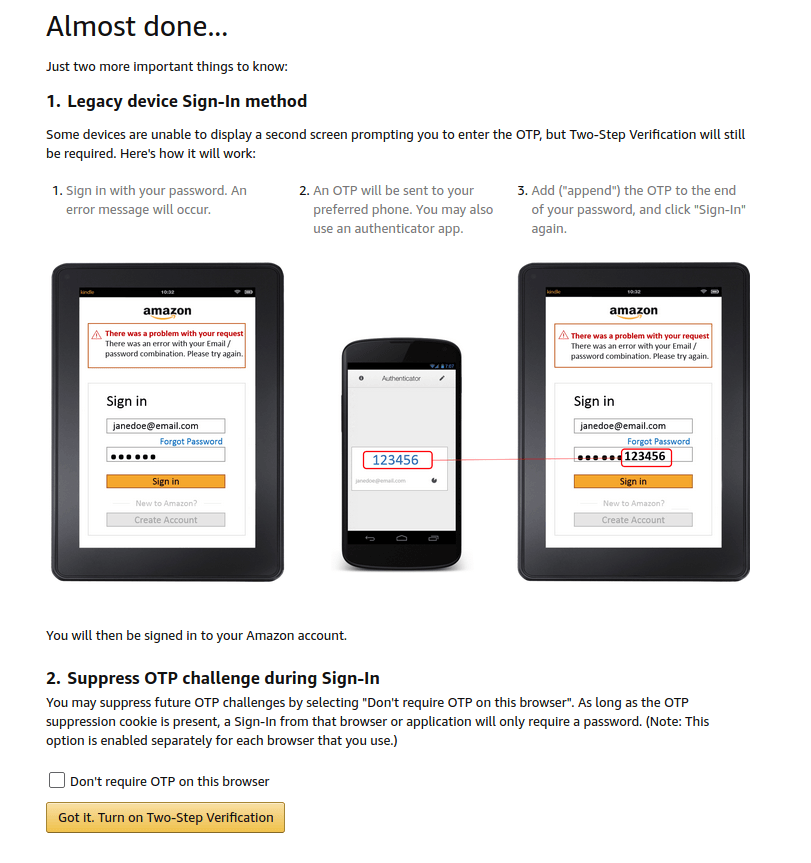
Once you are done with those two important things, you can hit the Got it. Turn on Two-Step Verification button and get on with your life (or the next service you want to set up for 2FA!).
Bitwarden: Two-step login
Bitwarden is one of the best password managers and is a great place to store not only all your passwords, but all those backup codes you are accumulating as you activate 2FA on your favorite services. This makes it all the more important to do everything you can to protect your Bitwarden account, and implementing two-step login is the way to do it.
As befits a high-value, high-security service, Bitwarden offers a wide range of second factor methods for securing your account.
If you are using the free version of Bitwarden, you can use an authenticator app, or email (one option we seldom see) for your second factor.
If you use the premium (paid) version, you can also use pretty much any type of security key on the market.
Beyond that, you can enable more than one of the two-step login methods.
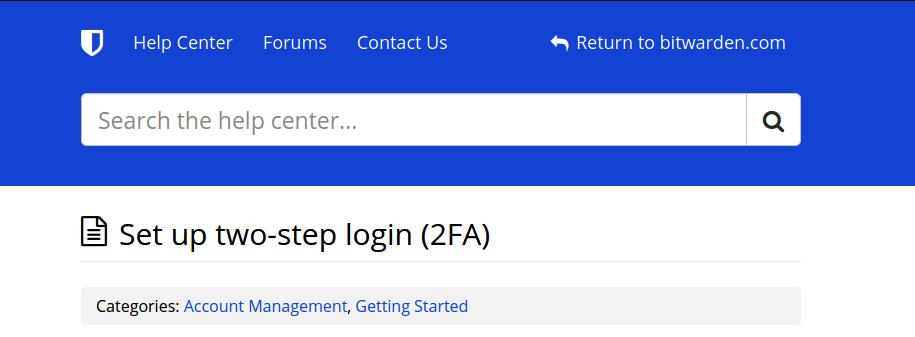
As you can see, it is a wealth of options, but Bitwarden provides detailed instructions for any and all of the supported methods, so just make your selections and follow the instructions.
Dropbox: Two-step verification
If you are like most people, you find it much easier to accumulate stuff in your Dropbox account than to clean out the stuff you no longer need. That tendency makes cloud storage services like Dropbox ideal targets for hackers. Activate Dropbox two-step verification to protect yourself from those creeps. This is how it's done:
Log into Dropbox on the desktop. Click your icon in the top right of the window, then Settings in the menu that appears. This takes you to the Personal Account page, where you'll want to select the Security tab. Scroll down to the Two-step verification section and set the slider to On.
Click the Get Started button in the information box that appears. Enter your password then click Next. Select one of the two options Dropbox presents: Use text messages or Use a mobile app, then hit Next and follow the instructions to complete the two-step verification process.
You'll get the chance to enter a backup phone number to receive codes in case you lose your primary security code source. You'll also get a bunch of one-time backup codes which you'll want to record in case you need them some day.
Note: Do you want a more secure and private cloud storage service? We've ranked the best cloud storage services with a focus on privacy and security.
Evernote: Two-step Verification
Evernote has been around for a long time, which you can tell if you look at the desktop app. It is another good target for bad people, and is often connected to a lot of other apps. This means both that you really need to enable two-step verification and that a lot of associated products could be affected when you do. Microsoft is well aware of this, and as you will see shortly, they have all the bases covered.
Here's how to use 2FA with Evernote and related products.
Start by logging in to the Evernote website using a desktop browser. Once you see Evernote on the screen, click your icon on the top left of the Evernote window. Click Settings in the menu that appears. When you arrive at the next page, click Security Summary in the menu running down the left side of the window. This takes you to the Security Summary page.
Click the Enable link in the Two-Step Verification section of the page. Evernote displays excellent instructions that explain everything and walk you through the steps.
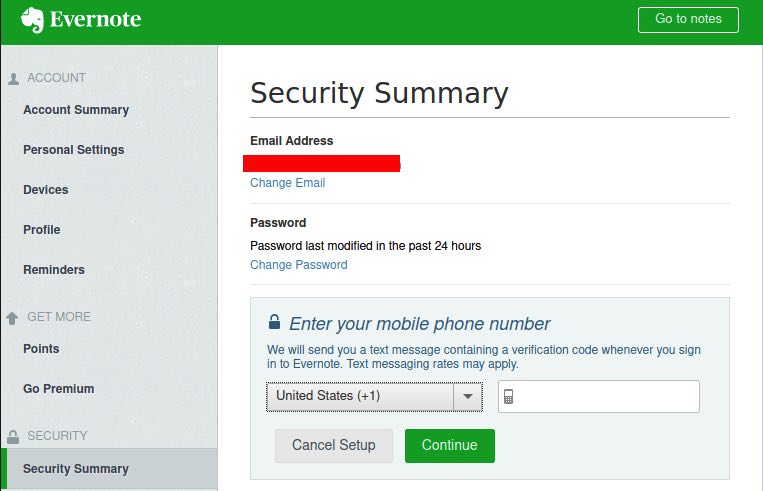
You'll need to enter a phone number to kick things off. Not surprisingly, an authentication app is the recommended method for verifying identity. But in a strange twist, receiving text messages is only possible if you have a paid Evernote premium account. That seems backwards to us, but what can you do?
There are a couple of kinks to the way 2FA works for Evernote. The one particularly annoying kink is that some or all of the apps attached to your Evernote will start demanding verification codes as soon as Evernote does. In a good kink (or just a smart adjustment), Evernote can generate whatever you will need to continue to get access to the apps attached to Evernote. Evernote will serve you four backup codes during the configuration of 2FA.
IMPORTANT: Make sure you record the backup codes that Evernote gives you. It will likely ask you a question about one of those codes before you can finish 2FA setup.
Facebook: Two-factor authentication
Facebook's two-factor authentication system will request your password and a verification code whenever someone tries to log in from an unrecognized device or web browser.
To set up 2FA for your Facebook account, click Settings, then in the menu on the left side of the page click Security and Login. On the Security and Login page, scroll down and click the Use two-factor authentication Edit button.
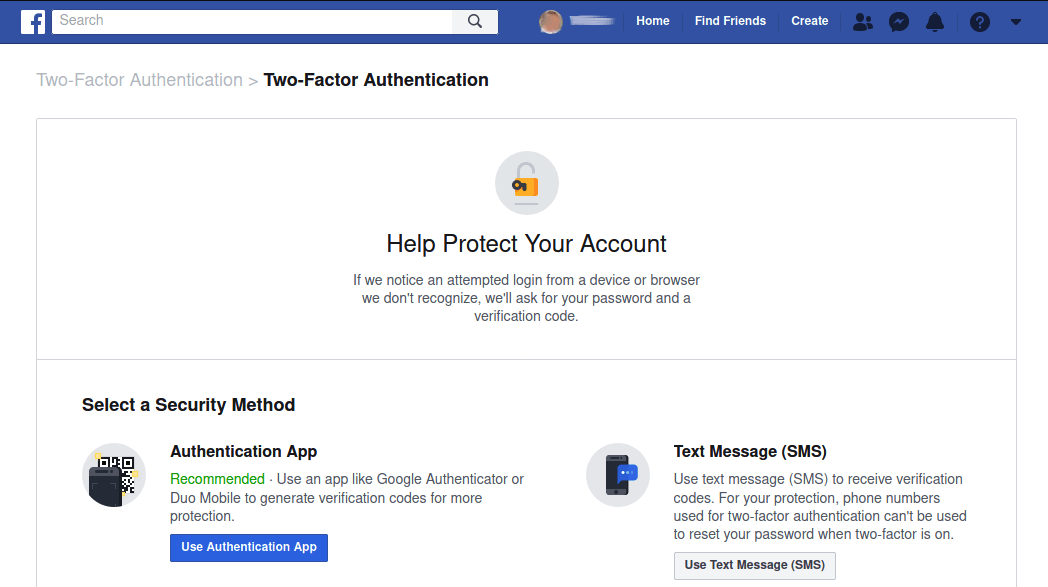
Select the Security Method you want to use (authenticator app, or SMS text message), then complete the steps to protect your Facebook account.
Google services: 2-step verification
The Google 2-step verification system works with everything from your Gmail account, to the Google Play store, to YouTube (which also belongs to Google).
To set it up, go to this page, click the Get Started button, and follow the instructions. Google offers you several different types of second steps to complete the authentication.
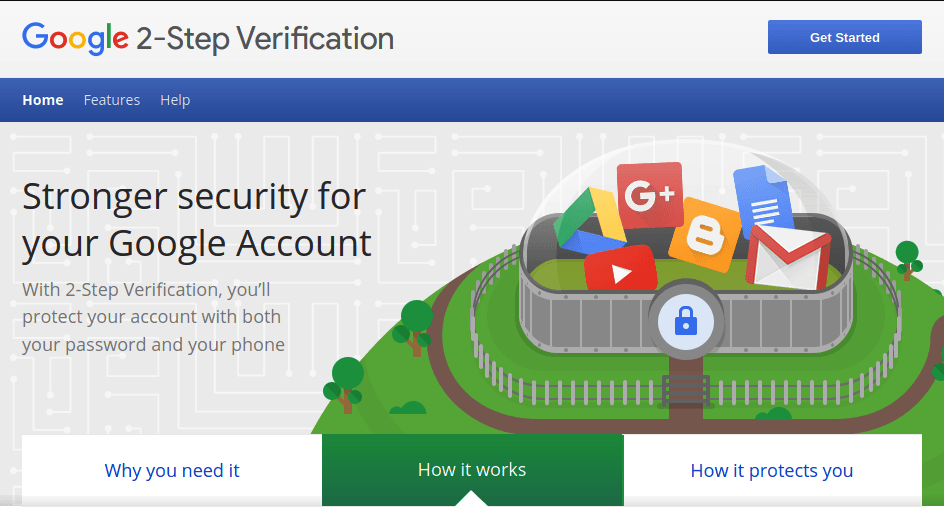
The default option is called Google prompts, which opens a prompt on your phone where you can simply tap Yes to confirm your identity and sign in to the service. Other types of second steps are available: voice or text messages, authenticator apps, security keys, and backup codes.
During sign-in, you can reduce the future hassle factor of 2-Step Verification by setting Google to skip the verification for that particular device in the future. This is safe to do because someone trying to log into your account using a different device would still have to complete the verification process.
If you need to make any adjustments to your 2-Step Verification settings, devices, you can do it by visiting this page.
Instagram: Two-factor authentication
Not surprisingly (since Instagram is a Facebook product) setting up 2FA on Instagram is very similar to doing so on Facebook. It will request verification whenever you log in from a phone or computer that Instagram doesn't recognize.
Note: You'll want to set this up on your mobile rather than on your desktop, since the desktop version doesn't support Authentication Apps for some reason.
So open the Instagram app on your phone and tap the hamburger menu in the top right of the app window. Next tap Settings, then Security. In the Security menu, tap Two-Factor Authentication.
Tap Get Started to go to the Choose Your Security Method page. Your options are text message or authentication app. We recommend the authentication app. Follow the instructions that appear on the screen carefully and the Instagram app will set up your choice of authentication app (Google Authenticator or Authy) for you.
LinkedIn: Two-step verification
LinkedIn offers a basic two-step verification system without a lot of options. You can configure it from the mobile app or the desktop. The desktop is the best bet, particularly if you choose to use an authenticator app, since you will be able to use your phone to scan the QR code.
To set up LinkedIn two-step verification on the desktop, start by clicking the Me menu, then Settings & Privacy. On the page that appears, select the Account tab, then Two-step verification. When the option appears to do so, click the Turn On link. You get the choice of two methods: authenticator app, or phone number (SMS).
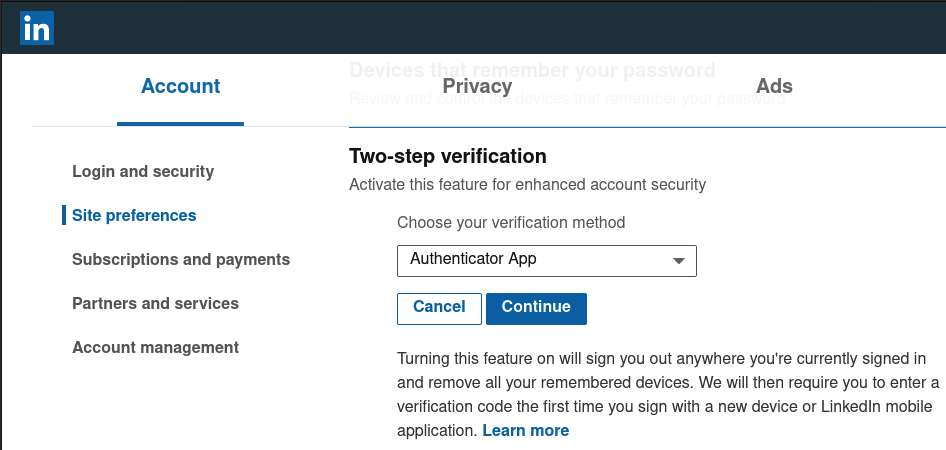
Choose your option in the menu and click Continue. LinkedIn will ask you to enter your password once again, then walk you through the setup for the method you chose. Follow the steps and you are ready to go. Note that LinkedIn will send you an email reminding you that you have successfully turned on two-step verification.
MEGA.nz: Two-factor authentication
MEGA is one of our favorite cloud storage services and it performed well in our MEGA review. Everything you store on MEGA is securely encrypted, but that won't matter if someone gets their hands on your password and you don't have 2FA activated. So let's do that now.
To activate 2FA, log into your MEGA.nz account and click your name in the top-right corner of the window to open your Account page. Next, click Security in the menu running down the left side of the page. On the Security page, find the Two-Factor Authentication section and slide the toggle switch to On. MEGA only supports using authenticator apps. They also give you a file you can download with your recovery key.
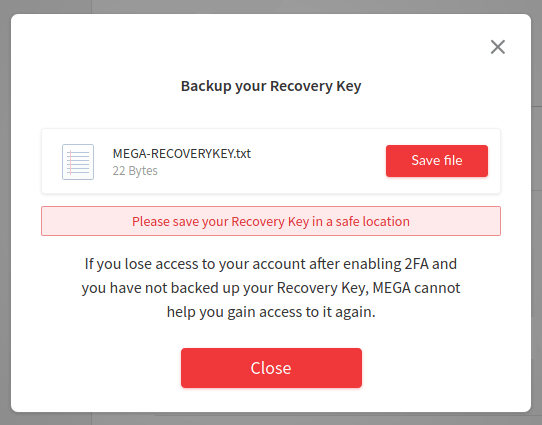
Make sure to store this in a safe place (like your password manager) so you can regain access to your account if you get locked out.
PayPal: 2-step verification
PayPal has all sorts of financial information and resources that a crook would love to get his or her hands on. If you are a heavy user of this service setting up 2-step verification should be a priority.
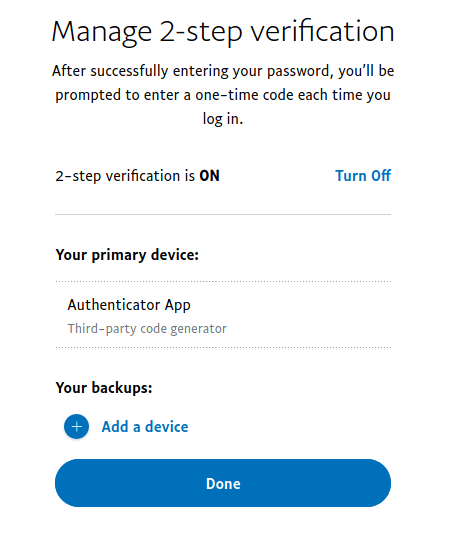
To start, hover the cursor over your name in the top-right corner of the PayPal window and select Profile Settings in the menu that appears. Scroll down to 2-step verification and click Update.
PayPal takes you to the 2-step verification and gives you a choice of three methods: text messages, authenticator app, or security key. Select the option you want then click Set It Up and follow the instructions. At the end of the process, PayPal gives you the option to set up a second authentication method as a backup.
Pinterest: Two-factor authentication
Pinterest 2FA is quick and easy to set up too — but there is a surprise twist at the end. Let's see what this is all about…
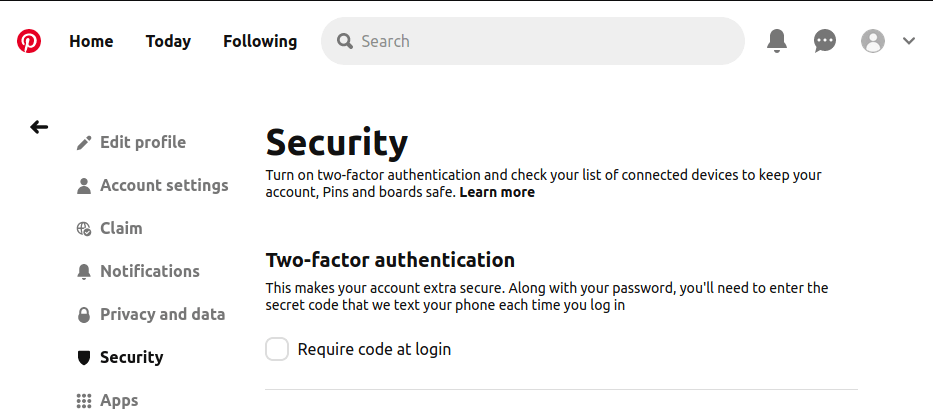
Here's how to use 2FA with Pinterest: Sign in to Pinterest on your desktop and click the down-arrow icon in the top right of the Pinterest window. In the menu that appears, click Settings, then Security.
Check the Require code at login box, then enter your password when requested and click Next.
Now you get the unfortunate surprise.
Pinterest only supports SMS messages for 2FA. So enter your Country code and a telephone number that can receive text messages to complete the process. Pinterest will send you a message with a confirmation code to enter.
They will also send you a backup code you can use to get back into Pinterest if you find yourself unable to receive SMS messages for any reason.
ProtonMail: Two-factor authentication
ProtonMail is one of our top picks for a secure email service. If you use it, we urge you to activate two-factor authentication and make your email account as safe from attack as possible. Note that you must use an authentication app for ProtonMail 2FA.
To enable 2FA on ProtonMail, log in to your account using the webpage (mail.protonmail.com). Once there, click the Settings icon. On the page that appears, click the Security option in the menu on the left side of the page. On the Security page, click the Enable Two-Factor Authentication button. ProtonMail provides a nice wizard that walks you through the rest of the process. They also provide you with 16 recovery codes. (See our ProtonMail review for more details.)
Reddit: Two-factor Authentication
Reddit has one of the easiest 2FA setup processes you will run into. It goes like this:
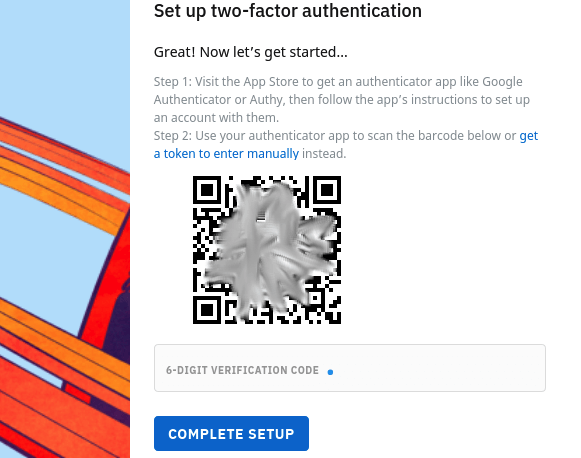
Log into Reddit on your desktop and click the menu icon in the top-right corner. In the menu that appears, click User Settings. On the User Settings page, select the Safety & Privacy tab. Scroll down to Use two-factor authentication and activate it with the slider next to it. This opens the Set up two-factor authentication dialog box, where you will first have to enter your Reddit password.
Reddit only gives you one option here: use an authenticator app.
Surfshark VPN: Two-factor authentication
Surfshark is one of the best VPN services that we have tested. And they are in the forefront of VPN support for two-factor authentication. They support two methods: authenticator app, and email.
We were going to explain how to set up 2FA here, but Surfshark has the whole thing laid out for you, including short video clips that walk you through the entire process.
Twitter: Two-factor authentication
Twitter is nice in that you can set up 2FA on either the desktop or the mobile app. Even nicer, the steps are the same for either type of device.
In the side menu, select Settings and privacy (you might need to select More to find it). On the Account page that appears, select Account, then Security. On the Security page, select Two-factor authentication.
Twitter lets you use any of the three main authentication method: text message, authentication app, or security key. Select the option you wish to use, then follow the instructions that appear.
Once you complete the 2FA steps, new options will appear on Twitter's Two-factor authentication page:
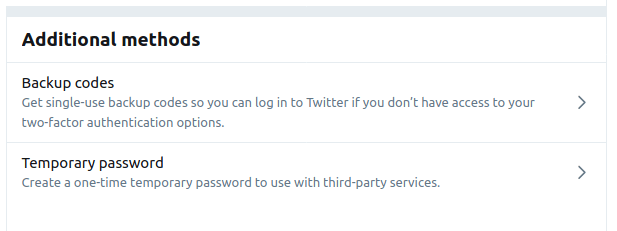
Record some backup codes to get access to Twitter if you don't have your phone handy for 2FA responses. Create a 1-hour temporary password for third-party apps and services that you can't log into otherwise.
WhatsApp: Two-step verification
WhatsApp uses two-step verification to register your phone number with WhatsApp again, such as if you were to log out of WhatsApp or want to switch to a new phone. Even if you are using something like web.whatsapp.com, you can only set this up using the mobile app.
To set it up, tap the three-dot menu icon on the top-right of the WhatsApp window, then Settings, then Account. In the Account menu, tap Two-step verification. On the page that appears, tap the ENABLE button to start the process.
First, you will need to create a six-digit (not the usual four) PIN that you must use to register your phone number with WhatsApp in the future.
Next, you will need to give WhatsApp an email address they can use to reset your PIN if you forget it.
Complete those steps and tap the DONE button. But you are not quite done after all. WhatsApp throws up one more page that gives you the chance to disable two-step verification, change your PIN, or change your email address. Tap the back arrows a few times to get back to your WhatsApp-ing.
Don't be surprised if WhatsApp asks you for your PIN every so often. The idea seems to be that if they keep making you enter it, you will eventually memorize the thing.
Conclusion
While it can be a bit of a hassle, using Two-Factor Authentication (2FA) has been shown to greatly reduce the risk of your accounts getting hacked.
When you consider how big of a pain it can be to get one of your accounts hacked, we think you will agree with us that putting up with the small, nagging pain of 2FA is better than the massive, stabbing pain of getting one of your important accounts hacked.
So take a deep breath, charge up your smartphone, and roll up your sleeves. If it is any consolation, we've heard that all the smart kids use 2FA now, so at least you'll be in good company.
This Two Factor Authentication guide was last updated on January 29, 2025.

Leave a Reply